


Installing Tiles? Here's Your DIY Guide
- classictilesltdtt
- Apr 8, 2024
- 7 min read
Ready for a home improvement project? You've decided to install some new tile, but aren't sure where to start. We've all been there! Tiling can seem daunting, but with the right tools, materials, and a little know-how, you can totally handle this DIY. Get ready to roll up your sleeves and learn the basics of tiling so you can transform your space. This step-by-step guide will take you through prepping your surface, choosing tiles, setting them properly, grouting, and sealing. We'll share tips to make tiling easier, faster, and help you avoid common mistakes. You got this! With the help of this tutorial, you'll gain the skills and confidence to install beautiful, durable tile that you can be proud of. Let's get started on your tiling adventure!
Preparing Your Surface for Tiling
The key to a successful tiling project is proper surface preparation. You'll need to clean, level, and rough up the area you want to tile.
Cleaning the Surface
First, thoroughly clean the surface to remove any dirt or debris. For walls, wipe down with a damp cloth to remove dust. For floors, sweep and mop. Any bumps or imperfections in the surface can telegraph through the tiles, so take time to do this step well.
Leveling Uneven Surfaces
Next, check if the surface is level. For walls, use a level to identify any uneven areas and fill them in with tile backer board or wallboard compound. For floors, you may need to apply a layer of thinset mortar to level the surface before tiling. Uneven surfaces can lead to broken or loose tiles in the future.
Roughening Up Smooth Surfaces
Finally, lightly sand or score any particularly smooth surfaces like concrete to give the tiles something to grip onto. Apply concrete etching compound or tile glue to areas like metal or fiberglass before tiling.
With the surface clean, level, and roughened, you've given your tile the best foundation possible. Take your time with these preparatory steps and the rest of your tiling project will go smoothly. Your gorgeous new tile floor or wall will last for years to come when installed on a surface that’s ready for tiling.

Selecting the Right Tiles and Adhesives
Tile Types
There are so many tile options out there, it can be overwhelming! For floors, ceramic, porcelain, and natural stone tiles are popular and durable. Ceramic tiles are affordable and come in a variety of styles. Porcelain tiles are denser and more water-resistant. Natural stone like travertine or slate adds character. For walls, ceramic, porcelain, glass, and metal tiles work well. Glass and metal tiles make a statement. Choose a tile suited for your space - what looks great in a bathroom may not in a kitchen.
Tile Size Matters
Large tiles, like 12 by 24 inches, make a space appear more open, while small mosaic tiles add visual interest. For DIY installation, medium-sized tiles are easier to work with. Buy about 10% extra to account for waste.
Adhesive Options
For most tile projects, cementitious thin-set mortar is a solid choice. It bonds well to most surfaces. Epoxy grout works for high-moisture areas. Mastic adhesive is suitable for small wall tiles, but avoid it for floors or wet areas. Make sure to choose an adhesive suited for your tile and substrate type.
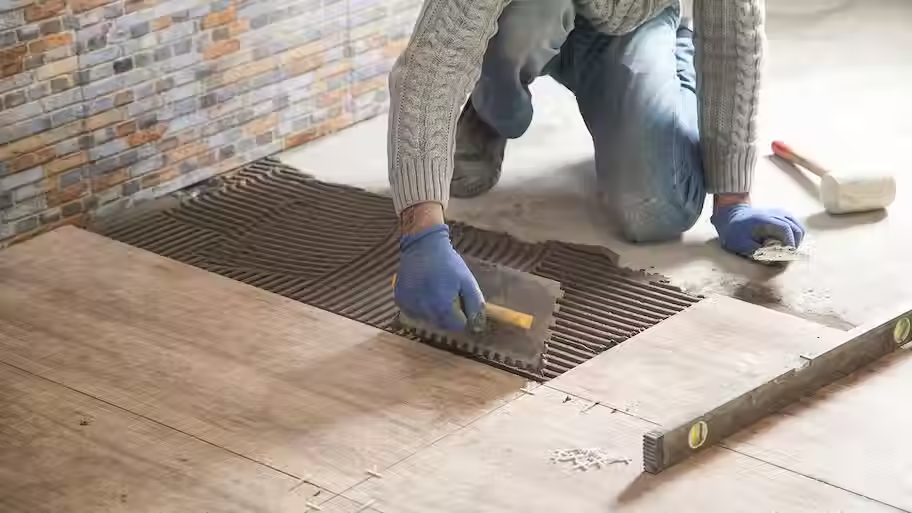
Trowel It On
Use a notched trowel to apply the adhesive. The trowel's teeth gauge how much adhesive to put on the wall or floor. Spread adhesive evenly over about 1 square yard at a time, then place tiles while the adhesive is still wet. Gently press tiles into the adhesive and slide them to ensure even spacing.
Grout Seals the Deal
Once adhesive has dried for 24 hours, you're ready to grout. Grout seals the spaces between tiles and adds strength. Apply with a grout float, let dry until crumbly, then buff away excess with a damp sponge. Your new tile is ready to enjoy for years to come!

Measuring and Cutting Tiles
To install tiles properly, precise measuring and cutting are key. Start by determining the layout of your tiles. Do you want the grout lines evenly spaced? Offset? Diagonal? Once you decide, measure the area you want to tile to determine how many full tiles will fit, and where you’ll need to cut partial tiles.
For walls, use a tape measure to get the height and width in inches. Divide by the dimensions of your tiles to see how many will fit. For floors, you may want to measure and chalk out lines as guides. Measure multiple times to ensure accuracy!
Cutting Tiles
When it’s time to cut tiles, you’ll need the proper tools: a tape measure, chalk, a scoring tool like a glass cutter, and tile snips or a Dremel tool with a diamond blade. Measure and mark the tile where you need to cut. Score the tile firmly with the glass cutter, then snap the tile with tile snips. Use the Dremel for curved cuts. Practice on spare tiles first.
For partial wall tiles, measure and mark the cuts, then score and snap as needed. You may need to cut notches or curves to fit around windows, doors or outlets. Take your time—measure twice, cut once.
For floors, you may need to cut tiles to fit along the edge of the room. You’ll also need to cut tiles to fit around doorways or other obstructions. Make relief cuts by cutting small notches at the edges of tiles, then snapping along the scored line. This allows tiles to fit snugly against trim or other edges.
With the proper tools and patience, you'll be measuring and cutting tiles like a pro. Precise cuts are key to achieving a professional result, so take your time and be meticulous. Your tiling job will look perfect when you’re done!

Applying the Adhesive and Laying the Tiles
Now that you have your surface prepped, it’s time for the fun part—setting those tiles! For the best results, work in small sections so the adhesive doesn’t dry before you place the tiles.
Apply the Adhesive
Use a notched trowel to spread tile adhesive onto about a 2x3 foot section of the wall. Hold the trowel at a 45-degree angle and spread the adhesive evenly over the area using smooth strokes. The notches in the trowel will leave ridges in the adhesive that help the tiles stick.
Set the First Tile
Press your first tile into the adhesive at the top corner of your section. Give it a firm push to make sure it adheres well. Use tile spacers between tiles for even grout lines. Place spacers in each corner of the tile before setting adjacent tiles.
Check Your Work
Once you’ve placed about a dozen tiles, take a step back and look at your work. Make sure all the tiles are level and aligned. If anything looks off, you can still make minor adjustments. Use a level tool to check that vertical and horizontal rows are straight.
Finish and Grout
Continue placing tiles section by section until you’ve covered the entire wall. Let the adhesive dry as directed, usually 24 to 48 hours. Mix your grout according to package directions and spread it over the tiles with a rubber grout float. Wipe away excess grout with a damp sponge once dry. Your tile installation is now complete and ready to be admired!
With some patience and the proper technique, you'll have stylish new tile on your walls in no time. Step back and enjoy the fruits of your DIY labor! Let me know if you have any other questions.

Grouting and Finishing Touches
Clean the tiles
Now that your tiles are installed, take a damp cloth and wipe away any excess mortar or debris from the tile surfaces. Make sure the tiles are clean and dry before moving on to grouting.
Mix the grout
For most tiles, a sanded grout that matches your tile color works well. Follow the instructions on the grout package to mix it to a thick, creamy consistency. Add a grout release or sealer to the mix for porous, textured tiles.
Apply the grout
Use a grout float or squeegee to spread the grout over the tiles. Work in small sections, holding the float at a 45-degree angle and packing the grout into the joints between tiles. Wipe away excess grout from the tile surface with a damp sponge as you go.
Let it dry, then buff
Allow the grout to dry as directed, usually 3 to 5 days. Once dry, use a soft cloth to buff the tile and grout to bring back the shine. For tougher grout haze or residue, you can use a commercial grout haze remover product, but test it in an inconspicuous area first.
Apply a sealer (optional)
For high-traffic or moisture-prone areas like kitchens or bathrooms, apply a silicone-based grout sealer to the grout joints. The sealer will protect the grout from stains and make it water-resistant. Reapply the sealer every 6-12 months to maintain protection.
With some finishing touches like caulk, baseboards or transitions strips installed, your tiling project is now complete. Step back and admire your handiwork—the tiles you’ve carefully selected and installed will provide years of beauty and durability. Congratulations on a job well done!

Conclusion
So there you have it, folks. Who knew installing tiles could be so doable, even for total newbies? With the right tools, some patience, and our easy step-by-step, you'll be rocking a beautiful new tiled wall, floor, or countertop in no time. Just take it slow, double check your measurements, use spacers for even grout lines, and don't be afraid to ask for help. Tiling is fun, creative, and super rewarding when you stand back and admire your handiwork. Whether you knocked it out in a day or spread the project over a few weekends, be proud of your tiling transformation. You did it yourself! Now kick back and appreciate how your blood, sweat and tiles have paid off.


This is a very helpful and confidence-boosting guide for anyone new to tiling. The step-by-step approach makes DIY projects feel much more manageable. A great resource for homeowners who want to understand the basics of Tile Installation before getting started.